Labels

Painting (372) GW (332) Games Workshop (331) Warhammer 40000 (240) Modelling (103) Astra Militarum (65) Imperial Guard (65) Epic (59) Chaos Marines (51) Warhammer 30000 (51) Space Marines (46) Tau (46) Airbrushing (44) Epic Chaos (44) Warhammer (43) Titan (39) Saga (31) Middle Earth SBG (30) Nurgle (29) Gripping Beast (27) IGTanks (25) Anglo-Saxons (24) Blood Bowl (22) Stormcrow Chapter (20) TauTanks (18) Orks (17) Wargames Table (17) Imperial Knights (16) Scenery (16) Black Scorpion (15) Epic Ultramarines (15) Frostgrave (15) Pirates (15) Age of Sigmar (13) 3D Printing (12) Warlord Titan (12) Kings Of War (10) Moria (10) Undead (10) Vampire Counts (10) Angmar (9) Death Guard (9) Forgeworld (9) Mordor (9) Quick Tips (9) Stormcast Eternals (9) AAR (8) Barad Dur (8) Battle Report (8) Goblins (8) Unboxing (8) Wood Elves (8) Isengard (7) Nippon (7) Orcs (7) Siege (7) Wargames Factory (7) Building modular tiles (6) Dreadtober 2016 (6) Sentinels (6) Skaven (6) Vikings (6) Workshop (6) Beastmen (5) Dreadtober 2017 (5) Dropzone Commander (5) Garroting'em Forest (5) Hawk Wargames (5) Humans (5) UCM (5) Warriors of Chaos (5) Imperial Agents (4) Mantic (4) Ogres (4) Sci-Fi Ruins (4) Solar Auxilia (4) Adepta Sororitas (3) Adeptus Ministorum (3) Dwarfs (3) Necromunda (3) Sisters of Battle (3) The Fellowship of The Ring (3) Dead of Dunharrow (2) Kharadron Overlords (2) Nazgul (2) Osgiliath (2) Photography (2) Renedra (2) Trolls (2) Uruk-Hai (2) Amera Plastic Mouldings (1) Armies (1) Bolt Action (1) Cities of Death (1) Days out (1) Germans (1) Giant (1) Marauder (1) Necrons (1) Perry Miniatures (1) Reaper Miniatures (1) Warlord Games (1) em4 Miniatures (1)

Tuesday 29 October 2013

Battlereport: Goblins vs Beasts of Chaos

Back in September 2012 my friend Mike and I played a Warhammer Fantasy game which was the first outing for my Beasts of Chaos army and also saw Mike's Goblins take to the table for the first time as a fully painted force.

It was a terrific game and Mike produced a great Battlereport for it over on his blog: The Old Giant.


Monday 21 October 2013

Unboxing: "Oriental Blades" by em4miniatures.com

Some time ago I began collecting models in order to build an army based on one of the "Warhammer Armies Project" unofficial Warhammer supplements: The "Nippon" armies book.

Being largely based on Feudal 16th Century Japan, sourcing miniatures hasn't been too difficult. I've previously written a series of posts regarding:

Being a Warhammer supplement and not a true historical wargame, however, means that it's going to have its roots in Fantasy. That means magic, monsters and exotic troop types. And as you'd expect these are in plentiful supply in the book; Ki-rin, Oni, Kabuki Dolls, Wako Pirates, Kitsune and so on.

The problem is that they're not so easy to actually find models for. The rank and file of Ashigaru and Samurai are in good supply thanks to companies like Wargames Factory and Perry Miniatures. But finding monsters, Shugenja (wizards) and female characters (like Kabuki Dolls and Battle Maidens) is a bit more difficult.

A lot of searching effort has gone on by those of us who have an interest in this army book and setting and many good finds have been posted over on the "Models for the Nippon Army" thread on the "battlereporter" forum.

One of the finds we made was a UK company called "em4miniatures". These are a supplier of  RPG and Wargames miniatures and accessories who specialise in pre-painted figures. They have a number of ranges, one of which is the "Oriental Blades" range. "Oriental Blades" is a small range of just 10 different miniatures and when I first found them, these were split into two sets "OB1" and "OB2". Both were available painted as a job lot and the minis from "OB1" were available unpainted as individual models. After some emails swapped between Doug at "em4miniatures" I managed to agree with him that he'd cast up some unpainted models from the OB2 range and would be happy to sell those as individual models too.

Now that, in my book, is customer service.

So a few weeks later I now have in my possession 22 models, all unpainted, from the OB1 and OB2 ranges that I can add to my growing collection, so I thought I'd show you all what I have.

First up, some "Female Adventurer" models which I intend to use as "Battle Maidens". I purchased 10 of these so can easily show "front" and "back" views. One model is from the "OB1" range, the other is from "OB2":
OB1 Female Adventurer, front & back

OB2 Female Adventurer, front & back


Next up, some "Ronin". Again,  I purchased 10 of these so can easily show "front" and "back" views. One model is from the "OB1" range, the other is from "OB2":
OB1 Scruffy Ronin, front & back

OB2 Ronin, front & back


Lastly I picked up 1 Ninja and 1 Shugenja:
Shugenja front (left), Ninja front (right)

Shugenja back  (left), Ninja back (right)


The photos here really don't do the models justice. The flash on the camera in conjunction with the metallic shine on the models has washed out a lot of the details that these models actually have. All the models are nice, clean, detailed sculpts, mould lines are virtually invisible and there is a small amount of flash as you'd expect from any lead casting. It's minimal though - I've seen far, far worse that cleaned up well. The poses are dynamic and dramatic.

As just £1.50 per model I certainly can't quibble on the price. Each is supplied ready for insertion into a GW-style slottabase and comes with a 1'' round "Warhammer 40K" type base.

If I was to make any sort of a grumble about anything, it would be about some slight inconsistencies in the models' sizes. The Ninja is clearly smaller and "skinnier" than the others, whilst one of the female adventurers and the Shujenga are larger. This doesn't bother me overmuch - in a Wargame it's the base size that's of paramount importance not the actual dimensions of the figures, but it might put some people off.

Thursday 17 October 2013

BattleReport: Warriors of Chaos vs. Lizardmen

BattleReport: Warriors of Chaos vs. Lizardmen, 02/10/2010
(Written by Mike, playing Lizardmen)

After last years Dwarf v Goblins grudge, both players were using ‘new’ armies to try and seek the satisfaction of a... Total Massacre!
Dean played a very nicely painted Warriors of Chaos army. This was led by a Daemon Prince of Khorne. With his ability to fly and cause Terror this was one to watch out for. I played Lizardmen painted to a decent wargaming standard. This was led by a Saurus Oldblood on Carnosaur. The Saurus had bought a sword of Always Strikes First, a shield +1 save and a Ward save 5+. Added to his stats, a very tough cookie. I get the impression Dean was a little worried about this one.
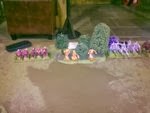
Scenery was very simple: A long hill with a portion that was impassable cliff along one baseline, a wood, a rocky patch and a ruin. Not too much to get in the way of a good old fashioned blood bath, we hoped!
Deployment:
Warriors of Chaos spell choice:
  • None
Goblin Spell choice:
  • None
Both sides had previously agreed not to use magic in the game. This was to be a game of close combat!
The Lizardmen won the deployment roll and elected to deploy first, taking the side of the table with the long Hill at the end of the deployment phase the table looked as follows:
Turn 0: Deployment
The Lizardmen won the "who goes first" roll and elected to take the first turn.
Turn 1
The Lizardmen line generally moved forward, with just the Terradons and General on Carnosaur holding back (the Cold One Knights pass their Stupidity test).
---
The WoC advance as well, with the Daemon Prince Holding back. The Lance Knights on the WoC left flank make a sneaky advance by changing formation to pass into the ruins and then expand out again. They sacrifice movement for tactical advantage. Now the fear causing Cold One Knights have no one to charge – the wall of the ruin blocks their path.
Turn 1
Turn 2
The Lizardmen fail the Stupidity test for the Cold One Knights who then move forward cautiously. Most of the other units move forward (not march).
The Stegadon fires its giant bow at the Marauders in front of it and kills three of them for good measure. The skinks skirmishers shoot their blowpipes at the same target but fail to score any more Marauder casualties. The Salamander aims at the marauders in front of it and MISFIRES killing three of its handlers. The Sallie then fails a panic test and runs back 3 inches toward the Terradons. The Sallie’s Unit Strength is now reduced to 4 meaning it can still try and rally next turn.
---
The WoC move the Daemon Prince by charging him at the unit of Skinks and Kroxigor. This fear-causing unit faces a charge from a Terror causer. They fail a fear test but as they outnumber their enemy they stand to fight needing 6’s to hit.
The Warhounds add to the misery of the Skinks and Kroxigor by charging as well.
The Sword Knights move to a few inches in front of the Lizardman General, just out of fear test range (Terror test would commute to fear for Knights of Chaos as fear causers themselves).
The Lance Knights on the left flank charge out of the ruins and into the unit of 15 (red) Saurus Warriors, who respond by failing their fear test (yes all these units failing fear are Cold Blooded and STILL fail their tests – how bad is that for dice rolling!) The Knights outnumber the Saurus (US of 20 versus US of 15). The Saurus flee 3 inches and are ridden down by the Knights. Scratch one block of troops.
In combat, the Daemon Prince and Warhounds kill 4 skinks. The Kroxigor and skinks respond with no kills! The skink/Krox unit loses combat (outnumbered) and flee 6 inches. The frenzied Daemon Prince pursues 8 inches and “flies them down” grinding their bones into dust. Strike another unit. The Warhounds fail a roll to restrain them and pursue into the rocks by 9 inches.
The Lizard men’s general is within 6 inches of the fleeing unit and makes a panic test. His cold-bloodedness saves him. The Terradons pass their panic test also.
Turn 2
Turn 3
The Lizardmen Cold One Knights pass their Stupidity test. The Salamander rallies this turn and reforms. The General’s Carnosaur charges the Sword Knights armed with ensorcelled weapons. The unit of Saurus Warriors with hand weapons and shields charges into the Marauders. The unit of Saurus with Spears and shields charges the unit of 18 Chaos Warriors. The Stegadon charges the Marauder unit.
The Carnosaur’s Terror is commuted to fear against the Knights. The Knights fail their test but outnumber the general and his mount and stand. They need 6’s to hit. The Oldblood and his mount kill two Knights, who respond by causing no wounds. The combat is drawn.
The Saurus v 15 Marauders ends with just one dead Saurus. The Marauders lose the combat and fail a Break test and are run down, losing their standard.
The Saurus v the 18 Chaos Warriors results in one dead CW and two dead Saurus. The CW lose the combat by one point but make their Break test and stand their ground.
The Stegadon v Marauders sees the humans taking six dead from Impact hits and fleeing. They manage to outrun the giant beast.
---
The WoC part of the turn sees some movement. The Spawn of Chaos charges the skink skirmishers. They stand and shoot and cause one wound to the creature. The Daemon Prince flies and charges into the rear of the 19 Saurus with hand weapons. The Saurus pass their Terror test. The Warhounds charge the Terradons. The flail armed Marauders move across the field. The Lance Knights move toward the rear of the Stegadon (possibly a mistake – see later!) Finally the Chosen charge the Salamander.
In close combat the Spawn of Chaos kills four of the brave little skink skirmishers. Their low toughness is no match for this hell-spawned monstrosity! They break and run 11 inches. The spawn pursues…. 10 inches. They survive!
The attack of the Daemon Prince causes three more Saurus casualties. The Saurus cannot attack back this turn. The Saurus win the combat on resolution. The DP is Stubborn and makes his break test.
The Chosen versus the Salamander. The Chosen kill the remaining skink handler and do 3 wounds to the Salamander who now only has 1 wound left. The Sallie loses combat and breaks and is run down by the chosen who mange to pursue into the flank of the Terradons!
The 17 Chaos Warriors v the 23 spear Saurus. Two dead Saurus to three dead CW’s. The CW’s lose combat and need to roll a break test of 4. They roll a 4 and stand!
The Chosen and the Warhounds versus the Terradons. Two Terradons are butchered and one is left with just one wound. The Terradon loses combat and fails its break test. It flies back over the rocks and is saved from being run down. The Warhounds manage to stop at the foot of the rocks.
The Knights with swords versus the Oldblood general and the now frenzied Carnosaur. The end result is a wounded Carnosaur (down to one wound) and two more dead knights. The combat goes on.
The engaged Saurus unit lose their fight with the Chaos Warriors but pass their break test and hold.
Turn 3
Turn 4
The Lizardman forces have been badly hit but are surviving. The skink skirmishers and the Terradon make their rally roll. The Cold One Knights pass their Stupidity check and make a charge into the rear of the unit of Lance Knights.
The Stegadon and Saurus unit both turn around to find fresh enemies.
As there is no shooting, it is on to close combat.
The Chaos Knights with their Lances have been hit in the rear by the Cold Ones and reel from this attack. Both units cause fear, which cancels out. The Cold One unit does one wound on the Chaos unit. The Chaos unit do no wounds in return. The Chaos Knights lose the combat by two and make a break test. They fail and rout six inches straight into the tusks of the Stegadon, which at a US of 10 means that they are destroyed. Score one to the Lizards!
The 21 spear-armed Saurus continue their fight with the 14 Chaos Warriors. This time, the Saurus take a lashing and lose six men. In return they can do no wounds and lose the combat by 3. The Saurus fail their break test even with cold-blooded and run 11 inches. The Chaos Warriors only manage to pursue five inches.
The Daemon Prince is now fighting the Saurus with hand weapons and the Saurus Hero who has managed to find his way to the new front of the unit. A challenge ensues. Neither the Lord nor the Hero can wound the other. The Daemon Prince is sorely outnumbered and loses combat again. He passes his break test with the stubbornness of a goat.
The Oldblood general and his badly wounded mount fight on. Both sides are tiring and this shows as no wounds are caused. The Lizardman loses on combat resolution but makes his cold-blooded break test.
---
The WoC forces fight on. The spawn of chaos has no choice but to attack the skinks again and charges into them. The flail armed Marauders charge into the Saurus who are busy fighting the Daemon Prince. Now they have something new to think about. The Warriors of Chaos unit charges into the back of the Spear armed Saurus. The Chosen move to close on the Carnosaur. The Warhounds turn and move toward the centre where the DP is fighting.
In combat, the Spawn kills four skinks that flee and are run off the table. The spawn manages not to pursue.
The WoC v the spear Saurus. This ends with four dead Saurus and no Warrior casualties. The Saurus lose the combat by a massive 6 combat resolution and fail their break test. They run 10 inches but so do the pursuing Warriors who hack them down and destroy them.
The DP and Marauders with flails versus the Saurus with hand weapons. This Saurus plant a wound on the DP. In return the DP kills one Saurus. The flails do their deadly job and claim two more Saurus. The Lizards lose this combat by one but pass their break test.
The Oldblood and his mount fight on. The general escapes being wounded thanks to his magic charms. The Carnosaur is not so lucky and takes three wounds to his bloody frame. It is too much and he collapses. Unnerved, the large Saurus jumps to the ground and fights on foot. He lost the combat by two but does not break.
Turn 4
Turn 5
The Lizzie Cold Ones passed their Stupidity check but had no opponents to declare a charge against. The Oldblood general passed his rally test and stood firm again.
The Stegadon turns to face the Marauders on the edge of the table (who rallied and reformed). The Cold Ones turn to face the Spawn of Chaos.
The Terradon flies over the Warhounds and drops rocks. It kills three of them but more importantly causes a Panic test. Sad to say for the Lizardmen, the Warhounds are within 12 inches of their General DP and use his Ld of 8. They pass the test and remain standing Warhounds!
The Stegadon bow kills two of the Marauders in its sights and as there were only six of them, they take a Panic test. They fail and flee off the table (no standard captured).
In close combat, Saurus and their Hero still fight the DP and flail Marauders. In the challenge, the DP causes two unsaved wounds and kills the Saurus Hero (no ward saves made this time). The flail’s fail to cause any unsaved wounds. In return the Saurus Warriors kill three Marauders. The DP and flails lose the combat by four and make a break test. The stubborn DP loses his frenzy and fails his test and flies/flees a massive 3 inches. The Saurus are soon to be disappointed as miraculously the Marauders pass their break test. The Saurus have to stay and fight the humans. The DP lives to fight again!
---
The Warriors of Chaos redouble their efforts. The sword armed Knights charge into the rallied General. His sword gives him the edge as he has Always strikes first. The Spawn of Chaos makes it randomised charge distance and ends up an inch short of the Cold One Knights. The DP rallies.
The Saurus and Flail-men are locked in combat. The Warhounds, Chosen and WoC units all make turns.
In close combat, the Flail Marauders kill one Saurus. In return, the Saurus manage to kill four Marauders. The Marauders lose the combat by five. The make a break test using the newly rallied DP’s Ld of 8. They fail the test and flee 10 inches. The Saurus pursue but only make seven inches. Those Marauders live a little longer.
The sword armed Knights have to wait until the Oldblood strikes first to see whether they have anyone left to fight with. The Oldblood kills two more Knights who themselves fail to wound the grizzled General. The general still loses the combat by one as he is outnumbered. His cold-blooded nature saves him. The fight continues.
Turn 5
Turn 6 - Final turn
The Lizardmen Cold One Knights pass their stupidity check and charge the Spawn of Chaos. The Saurus charge the Marauders in the rear. The Terradon charge the Marauders in the flank.
The Stegadon turns to face the DP and shoots its giant bow. The DP saves a wound.
In close combat, the Cold One Knights manage to put only one wound on the Spawn. In return it manages no damage. The Spawn loses combat but is Unbreakable anyway and stands around on its last wound.
The Terradon and the Saurus both fail to damage the flail armed Marauders. In return the flails kill the Terradon with one wound but fail to do any damage to the Saurus. The flails lose the combat by six. The flails fail their break test and run 10 inches. The Saurus pursue five inches into the Chosen and the Warhounds.
The Oldblood kills two more Knights who in return fail to do any damage. The Knights lose the combat by one but pass their break test on a seven.
---
The Flail Marauders rally. The DP charges into the Cold Ones. The Warriors of Chaos unit charges into the front of the Cold One Knights. The Spawn of Chaos charges into the Cold One Knights. The Warhounds charge into the Saurus Warriors. The Chosen charge into the Saurus Warriors.
The remaining Knight manages to cause one wound to the Oldblood General but only after he struck first and killed one more Knight. Just one Knight standing against this bloodied and grizzled Saurus General.
In close combat, the Chosen kill six of the Saurus Warriors in a bloody hail of attacks. The Warhounds do no additional damage. The Saurus manage to kill three Warhounds. The Saurus lose the combat by three and fail their break test. They flee five inches and are run down by the Warhounds who move seven inches in pursuit.
The DP, Spawn and Warriors (halberdiers) all fail to kill any Cold One Knights. In return the Cold One Knights kill one Warrior. Despite this, the Cold One Knights lose the combat by one and fail their break test. They flee and are pursued by the Spawn of Chaos who rolls 14 inches for pursuit and crushes them into the ground.
There, the game ended…
Turn 6
Conclusion: A big Victory for the Warriors of Chaos.
At the end of the game, the Victory points were added up. Briefly, both Armies controlled one table quarter and the others were either neutral or disputed. However, the number of units destroyed by Chaos gave the game to them. The Lizard’s didn’t make much of a dent in their enemy. The only Lizardman units standing at the end were the Oldblood General, minus his Carnosaur (so much steak on the Chaos BBQ that night!) and the Stegadon. At the conclusion of this 2250 pointer, the Warriors scored 2602 Victory points and the Lizardmen 1519. A difference of 1083 points giving a Solid Victory to the forces of Chaos.
From the Lizardmen perspective...
Well, that could have been better! A few things struck me as BAADD. Firstly, not taking a BSB was a howler. It could have made a big difference in the game. No magic for the Lizardmen may have been bad news as well. My Oldblood on Carnosaur simply got tarpitted against the Knights for the whole game and allowed the rest of the Warriors to choose their targets. I got the feeling that Dean had weighed up the odds in combat of certain units and also where to deploy each troop type carefully. From the moment the Warriors of Chaos broke out of the ruin with those Knights to the very end it seemed that skill and luck were very much in Dean’s favour. My smaller “auxiliary” units seemed to stumble and fall quickly during the game. Though some bad dice rolling seemed to plague the Lizardmen, the fact is that if I had done more homework on the Warriors and deployed better, I would have had to make less Leadership checks in the first place. The Lizardmen are a powerful force in combat and should not be dismissed on the basis of one battle. All in all though, Dean played well and got the solid victory he deserved – blessings indeed from the ‘Eye’.
In future if I were to take a Lizardman army again I would probably drop the Carnosaur, put a Lord and BSB in the ranks of a large Saurus unit and possibly take a Slann Mage. I would probably drop everything else barring the Stegadon and just go with blocks of Saurus full stop. Large blocks of troops with useful characters seems to be the way for Lizardmen!
From the Warriors perspective...
Mike’s suggestion that I had carefully weighed up odd was bang on the money. I prepared for this game reeling from a series of defeats (that goes back years – nay – decades!) and did as much research and preparation as I could.
We made a decision early on to exchange army lists before the games started. I’d done a lot of work trying to create a balanced list and when we exchanged, I decided to sit down and work out the best way of tackling Mike’s army (without making any alterations to my list).
I spent a few work lunch-breaks with a spreadsheet simulating dice-rolls to try and weigh up which of my units to try and pit against Mike’s on the day. Any battle plan goes to pot as soon as deployment starts, but I did my best to ensure that I deployed units to engage enemy units I’d decided they were best suited to tackle. I got to match up pretty much where I wanted to (about 80% success).
I was very nervous about the Lizardmen’s Cold Blooded rules (if you don’t know, they get to roll 3d6 for Ld based tests and discard the worst die) as it basically meant the odds of them failing a test were minimal. Mike rose to the challenge however and pulled some shocking rolls out of the bag!
Things I wasn’t happy about: The Daemon Prince was number one. His saving grace is his great mobility – I was able to use him as a harassing unit – mixing up Mike’s back line in order to disrupt his manoeuvrability and slow down dangerous units. That said, he’s actually a very weak troop when you look at his points cost and just doesn’t lay out enough damage for the money.
Also the terrible decision I made to advance my lancers on the Stegosaur enabling them to be charged in the rear and get ridden down without causing a wound! Almost 20% of my army rubbished due to a bad a call.
Ah well – it’s all “Blood For The Blood God!

Monday 14 October 2013

Battlereport: Dwarfs vs. Goblins

BattleReport: Dwarfs vs. Goblins, 22/08/2009

A grudge match and it doesn't get much grudgier than a Dwarf vs. Goblin bash.

Mike played Goblins (and it was a Goblin army proper - not an Orc in sight. Heavy support was offered by a Giant and a unit of three Trolls, but apart from a small unit of Snotlings all other models in the army were Gobboes) and I played Dwarfs (this game saw my first outing of a Dwarf army using the 2007 Dwarf Army book and also represented my first use of an Anvil of Doom and units of Thunderers).

Scenery was very simple: A steep-sided hill, a ruin and two areas of woods.

Deployment:
Dwarf spell choice:
  • None
Goblin Spell choice:
  • "Gork'll fix it" - cast on an enemy unit and any rolls of a 6 they make are converted to 1's. This spell was chosen by the Shaman referred to as "Red Shaman" as he was a member of a unit with a Red-painted standard.
  • Brainbursta" - a magic missile (24'', 2D6 S4 hits, no saves). This spell was chosen by the Shaman referred to as "Yellow Shaman" as he was a member of a unit with a Yellow-painted standard.
The Goblins won the deployment roll and elected to deploy first. At the end of the deployment phase the table looked as follows:
Turn 0: Deployment
The Dwarfs won the "who goes first" roll and elected to let the Goblins take the first turn (Once deployment was complete I could see he had no missiles so I wanted to allow him to advance within range of my Crossbows and Handguns).

Turn 1

The Goblins began in true Goblin form: by declaring a "Waaaghh!". The Goblin General, Red Shaman unit and the Spiders1 unit all gain bonus moves and surge forward. The infantry units are causing me consternation from the beginning due to their size: they each have 35 models which makes them almost double the size of anything I have on the table. Despite the fact that they are "only gobboes", the sheer weight of numbers is likely to count heavily against me in close combat so it's imperative I reduce their size with heavy missile-fire before they close on me.
Thankfully, the Goblin army isn't without it's problems: The Trolls fail their stupidity roll and are only able to wander slowly towards me. All other units close at-the march covering a frightening amount of ground (especially those spiders and wolf-riders with their 7'' and 9'' moves, doubled-up for marching speed).

The Red Shaman uses his Brainbursta spell on the Hammerers: first blood goes to the greenskins as 2 Dwarfs fall.

Time for the Dwarfs to avenge their fallen: The Dwarf Warriors unit advances on the Yellow Shaman's unit - Disaster! Hidden in the greeny ranks (or the rank greenies - depending on your outlook) of the Goblin General's unit are three Goblin Fanatics. The whirling loonies are release and one immediately careers through the Dwarf Warriors. Another Dwarf falls. The other fanatics spin harmlessly into empty space - for now.

The Hammerers unit advanced on the Goblin General - more Fanatics are loosed, this time from the Red Wizard's unit, one of which spins wildly through the unit of Crossbows (Xbows 2) killing another 2 Dwarfs.

The Dwarf Runelord attempts to strike a rune of Wrath and Ruin on the Anvil of Doom, which fails, knocking the Anvil out of action for the next turn.

Both Bolt Throwers miss their targets, as does the Grudge Thrower (a mistake is made here by me: The Grudge Thrower has a rune of Accuracy inscribed upon it which I managed to consistently forget to use throughout the battle until right at the end).

More success is enjoyed by the Thunderers: Unit 1 kills 1 spider-rider, unit 2 kills 2 spider-riders. The Quarrelers are similarly successful  unit 1 kills 3 spiders (who despite their losses don't panic) and unit 2 kills 3 gobboes in the Red Shaman's unit. The Gyrocopter looses it's steam cannon at the Spiders 2 unit, killing just 1.
Turn 1

Turn 2

Trolls are Trolls - stupidity strikes them for a second turn in a row.

The Fanatics do less harm this turn - 1 Fanatic's heart explodes, another moves harmlessly through Crossbow unit 2 and the other just wander around in a state of rotational oblivion.

On the Dwarf right-flank, things aren't looking good for the Bolt-Thrower crew as they are charged by the Goblin Spider-riders. Being Dwarfs, they're not allowed to Flee! their machine and as it's a War Engine it can't stand and shoot, so it's going to have to be a straight fight. The Dwarfs don't stand a chance and are destroyed to a man.

Still on the right of the battlefield, the Spider unit 2 charges the Gyrocopter which elects to Flee! Hopefully it can rally next turn and not be needlessly destroyed.

The Goblin Spider onslaught continues on the left as Spider unit 1 charges Dwarf Crossbow unit 1. 

The Crossbowmen stand and fire and kill 2 Goblins - as they're a unit of 6 due to casualties taken in the previous round that represents more than 25% of their remaining number. They're not so brave this turn and panic and Flee! 3d6'' - Mike rolls 3 6'es. Run, Spideys, run!

The Goblin Wolf-riders fail their animosity roll and begin squabbling amongst themselves - they can't move or fight this turn.

All other Goblin units advance on their targets - things are gonna get bloody next turn!

Both Goblin Shamans attempt to summon their magicks and fail.

The Dwarf Slayers charge and engage the Spiders who saw off the Gyrocopter - no wounds are caused by either side and the unbreakable slayers stand their ground.

The Hammerers and Warriors unit both elect to move backwards slightly in an attempt to avoid being charged by the Goblins next turn - they're both slightly short of being able to charge their nearest foes and if they are to stand a chance against the superior Goblin unit sizes need the advantage of the charge.

The Anvil of Doom is out of commission for this turn due to the mis-cast in the last, so the Dwarfs missile barrages begin. Crossbow unit 1 looses a salvo of bolts at the approaching Giant and cause 2 wounds. The Thunderers unit 1 also shoots at the Giant and - despite 5 accurate shots - no wounds are caused. Damn these new-fangled handguns!

The Grudge Thrower attempts to fire at the Yellow Shaman's unit but misfires - no serious effects just a wasted shot.

The remaining Bolt Thrower fires at the Animos (a word Mike proudly invented on the day) Wolves and misses, whilst in the centre of the table Goblins are falling like rain: Thunderer unit 2 kill 6 in the Yellow Shaman's unit and Crossbow unit 2 kill a further 3. Despite the loss of 9 Goblins (which is > 25% of their 35-strong unit) the doubty Goblins hold the line - the neighbouring Goblin General's unit and their Army-standard keep discipline admirably.

The Slayer and Spider-rider stand-off continues - still no wounds caused by either side.
Turn 2

Turn 3

The routing Spider unit on the Dwarfs' left flank continues to Flee! making it right to the table-edge. If they don't rally next turn they're off the battlefield.

The Trolls finally manage to gather their wits and take the opportunity to charge the Slayers, who are now seriously outnumbered.

Heady with their victory over the Dwarf Bolt-Thrower, the Spider-riders on the right flank begin to squabble amongst themselves over the spoils ("I said I wanted a leg!"). Animos strikes them immobile.

The Wolf-riders are still in-fighting too - Animosity strikes them for a second turn in a row. 

Animosity has a different effect on the Yellow Shaman's unit who gain a 2'' bonus move as a result. The advantage is pressed as the Shaman charges Crossbow unit 2. The nervous Dwarf unit looses a rain of bolts at their approaching enemy but fail to cause a wound. The Dwarfs fight well in close combat killing 3 Goblins compared to their enemy's score of 0, but the overwhelming size of the Greenskins' unit is too much for them, they break and are caught and destroyed.

The Giant charges the other Crossbow unit who similarly stand and shoot but with more success - 2 more wounds caused against their mighty opponent. The doughty Dwarfs shrug off the effects of Giant-Terror. The Giant's massive club sweeps through the ranks of the Dwarfs, killing 3. The Dwarfs return the favour - axes bite deep into the Giant's feet and ankles causing another wound.

The Trolls and Spider-riders combined vomit and poison attacks see off 2 Slayers. In exchange the Slayers wound 1 Troll. Being unbreakable the combat stands to continue next turn.
Grasping their axe-handles firmly the Dwarf Warrior unit charges the Snotlings, who are wounded, break and are pursued and cut down.

The Gyrocopter rallies and moves mid-battlefield to open up options for next turn - it's not able to shoot this turn so spends the time getting to a place where it can pick it's target next time.

The Hammerers charge the Goblin command unit - the unit Champion calls out a challenge to the Goblin General. It's a bad move - the Goblin chieftain is wounded in the fray but the Hammerer Champion is cut down. Aside from that, the remainder of the combat is even - 2 dead on each side. The Dwarfs are hard pushed to hold ground against the seething green mass but manage to stand fast.

Things aren't going so well for the beleaguered Slayers - a further 4 slayers are killed by Spiders and Troll-vomit in exchange for just 1 wound on a Troll.
Turn 3

Turn 4

The psychology and compulsory movement phase is a bit of a mixed blessing for the Goblins: on the positive side, The routing Spider unit 1 rallies just short of fleeing the table and a Fanatic whirls gibbering through the Dwarf Warrior unit, killing 2. More negatively  another Fanatic spins into a wood and dies, another's heart explodes with the strain whilst a third careens gibbering into a friendly unit: Red Shaman's unit takes 2 casualties. To add insult to injury, the infighting in the "Animos" wolf-riders continues for a third turn.

It's largely a housekeeping round for the Goblins: Yellow and Red Shamans either fail or don't bother trying to cast any spells, Spider unit 2 spends a turn reforming, as does both units associated with the Shamans.

In the Troll/Spider-rider/Slayer combat there's another stand-off with no wounds caused.
The Goblin command unit kills a Hammerer who respond by killing a Goblin and wounding the General. The Dwarfs are again hard pressed but manage to hold their ground.

The Dwarf Gyrocopter pilot seizes an opportunity to cause some mayhem amongst the ranks of Yellow Shaman's unit - wheeling around to their rear he unleashes a blast of steam-powered grapeshot from his steam-cannon, the blast causing the demise of 8 greenskins.

The War machines have another bad round - the remaining bolt-thrower and the Grudge-thrower both miss their targets (still forgetting to use that "Engineering rune of accuracy"). The Anvil of Doom is still out of commission and sits quietly biding its time.

Crossbow unit 1 fires on the Wolf-riders killing 1 and Thunderer unit 2 kills 2 more Goblins in the already damaged Yellow Shaman's unit. Braver than they look, the beleaguered Goblins stand their ground, again due to the iron will of their general the presence of their Army Standard.

In close combat, the Slayers manage to wound a Troll whilst otherwise avoiding harm, but things don't go so well for the Hammerers: despite killing 2 Goblins and only losing one of their own, they are overwhelmed by the weight of numbers in the massive Goblin unit and break. Fortunately, they manage to outdistance the pursuing Goblins.
Turn 4

Turn 5

The Wolf-riders finally manage to settle their differences and focus on their enemies. Unfortunately the Goblin Animosity problems aren't over as a fight breaks out amongst the troopers in Spider unit 3 on the other flank.

Fanatic activity continues as 1 spinning loony gyrates himself completely off the table whilst the other nutter veers insanely towards Spider unit 1.
The Spider-riders in unit 1 begin their approach towards the enemy with a forced march towards Thunderer unit 1.

Bolstered by their previous success, the Goblin General re-charges the Hammerers in the rear - they are forced to Flee! again and run off the battlefield. So much for Dwarf elite troops!
The Goblins of the Yellow Shamans' unit charge the Dwarf Warriors in the flank whist the Shaman himself ineffectually gibbers spells into the air. One Goblin dies in the ensuing combat. Red Shaman, depressed at the state of magic in general doesn't bother even trying to cast a spell. The charging Wolves connect with the crew of the Dwarf bolt-thrower who enjoy far more success than their colleagues did against the spiders on the other flank: 2 Wolf-riders killed for no Dwarf casualties.

Dwarf Crossbow unit 1 charges the Wolf-riders killing 1-rider, who in turn kill 1 Bolt thrower crewman. The Wolf-riders break and flee from the table.

The Runelord on the Anvil of Doom finally manages to summon the power of his mighty relic and strike a successful "Rune of Wrath and Ruin" on the Goblin General's unit, killing 1 Goblin. The Gyrocopter presses the attack and with another mighty expulsion from the steam cannon kills another 9 Goblins in the General's unit. The sheer force of the General's discipline is not to be sneered at - he once again manages to hold his troops together. He really is the Goblin equivalent of Brian Clough!

Things are going well for the Dwarfs: Thunderer unit 2 kill 2 Spider-riders in Spider unit 2 who panic and Flee! whilst the Grudge thrower finally manages to kill some Goblins in the same unit (granted, it had been shooting at the Trolls, but you take what you can get).
In close combat, the Dwarf Warriors kill another Goblin in Yellow Shaman's unit.
Turn 5

Turn 6 - Final turn

The Spiders are suffering: unit 1 continues to Flee! whilst unit 3 is once again "Animos". Unit 2 fares better - it rallies and begins the process of reforming.
The Trolls declare a charge against Thunderer unit 2 who stand and shoot, killing 1. The Trolls rout!

Red Shaman picks himself up out of his depression and successfully casts "Gork'll fix it" against Thunderers 2, but the spell is quickly dispelled by the Runelord. Yellow Shaman's attempt to cast Brainbursta fails.

The news isn't all bad for Yellow Shaman, however as his unit manages to overwhelm the Dwarf Warriors who break and Flee! They aren't caught and destroyed (but their little hairy legs are pumping furiously to make good their escape).

The Dwarf Runelord's anvil speaks again: he kills three Spider-riders in Spider unit 2 with his "Rune of Wrath and ruin". The Gyrocopter joins in the cause and kills a further spider in the same unit, which panics and flees!

The final shots of the game are fired by Thunderer unit 1 and the remaining Bolt Thrower who manage to kill 3 and 2 Goblins in Yellow Shaman's unit, respectively. The Grudge thrower, of course, misses. Again.
Turn 6

Conclusion: A draw

At the end of the game, the Victory points were added up. Briefly, both Armies controlled one table quarter and the others were either neutral or disputed. The Goblins had caused more damage than the Dwarfs, but not by enough of a margin to claim a victory.


From the Dwarf perspective...

I was disappointed with how the Anvil of Doom performed. For such an expensive piece (it alone counted for almost 20% of my army) it wasn't very effective. Even the huge pool of dispel dice it offered weren't really needed as the Goblin Shamans proved largely ineffective (they were only 1st level Shamans).

I was also disappointed with the performance of the War machines - the Bolt Throwers and Grudge Throwers failed to hit anything in almost every turn (not helped by me continually failing to use the Rune of Accuracy inscribed on the Bolt thrower).
The Dwarf missile troops were the stars of the show - they caused a terrific amount of harm with their handguns and crossbows. Well done, lads! 

I was also very pleased with the performance of the Slayers: although they ultimately lost their melee with the Trolls and Spiders, they kept those two, more expensive units tied up for several turns, thereby preventing them from doing more harm.

I wasn't expecting as much from the Gyrocopter as it eventually gave me - the steam-cannon cut great swathes through the ranks of the Goblin foot in the latter-half of the game. I'm not sure it would have done as well against a tougher army, but against these little greenskins it was brilliant.


From the Goblin perspective...

From chatting with Mike after the game I know he was disappointed with the performance of his Shamans. He also wasn't a fan of the Snotlings.

I think his biggest disappointment was the Giant, though, which was cut down fairly easily by the Dwarf Crossbowmen. It had cost him a lot of points and didn't earn it's coin.

Mike was also beset by Animosity and Stupidity problems (no offence, Mike) which is an occupational hazard of being a Goblin General. His Trolls were kept out of the battle for the first third of the game due to Stupidity and his Wolf-riders for the first half due to Animosity. Other units suffered too, to a lesser extent.

Friday 4 October 2013

BattleReport: Warriors of Chaos vs Daemons of Chaos

Warriors of Chaos vs. Daemons of Chaos

Overview

Location: Warhammer World, Nottingham
Date played: 13 August 2011
This report details a game played between Mike (Daemons) and myself (Warriors) using 6th Edition Warhammer rules. A thoroughly enjoyable game! I hope you enjoy reading about it.

Warriors of Chaos

General: Dean

  • Hero
  • G Exalted Hero of Khorne, General
    + Daemonic Mount
    Composition: Hero General; Mark of Khorne; Hand Weapon; Chaos Armor; Shield; Frenzy
    210 points
  • Special
  • K 8 Chaos Knights, Knights
    Composition: Special Barding; Hand Weapon; Chaos Armor; Shield; Causes Fear
    320 points
  • Hero
  • H1 Exalted Hero (Battle Standard Bearer), Hero
    Composition: Hero Hand Weapon; Chaos Armor; Shield; Battle Standard Bearer
    140 points
  • Core
  • M 14 Chaos Marauders, Marauders
    + Musician, Standard
    Composition: Core Musician Mus; Standard Bearer Std; Hand Weapon; Light Armour; Shield
    96 points
  • Special
  • L 10 Chaos Knights, Lancers
    Composition: Special Barding; Hand Weapon; Lance; Chaos Armor; Shield; Causes Fear
    450 points
  • Core
  • MF 15 Chaos Marauders, Marauder Flails
    + Musician, Standard
    Composition: Core Musician Mus; Standard Bearer Std; Hand Weapon; Flail; Light Armour; Shield
    117 points
  • CH1 10 Chaos Warhounds, Chaos Hounds 1
    Composition: Core
    60 points
  • CH2 10 Chaos Warhounds, Chaos Hounds 2
    Composition: Core
    60 points
  • W 15 Chaos Warriors, Warriors
    Composition: Core Hand Weapon; Chaos Armor; Shield
    240 points
  • H2 15 Chaos Warriors, Halberdiers
    + Standard
    Composition: Core Standard Bearer Std; Hand Weapon; Halberd; Chaos Armor; Shield
    267 points
  • Special
  • CO 5 Ogres, Chaos Ogres
    Composition: Special Hand Weapon; Extra Hand Weapon; Chaos Armor; Causes Fear
    225 points
  • Rare
  • S1 Chaos Spawn, Spawn 1
    Composition: Rare Causes Fear; Unbreakable
    55 points
  • S2 Chaos Spawn, Spawn 2
    Composition: Rare Causes Fear; Unbreakable
    55 points
  • HC Hellcannon, Hellcannon
    Composition: Rare Causes Terror; Large Target; Unbreakable
    205 points
  • Total: 2500 points

Daemons of Chaos

General: Mike

  • Core
  • F1 8 Chaos Furies, Furies
    Composition: Core Hand Weapon; Causes Fear; Daemonic; Flyer; Immune to Psychology
    96 points
  • Rare
  • F2 3 Flamers of Tzeentch, Flamers
    Composition: Rare Flaming Attacks; Hand Weapon; Causes Fear; Daemonic; Immune to Psychology; Skirmishers
    105 points
  • B 2 Bloodcrushers of Khorne, Bloodcrushers
    Composition: Rare Hand Weapon; Causes Fear; Daemonic; Immune to Psychology; Killing Blow; Magic Resistance (1)
    140 points
  • Special
  • S1 5 Seekers of Slaanesh, Seekers
    + Musician
    Composition: Special Armour Piercing; Hand Weapon; Musician Mus; Causes Fear; Daemonic; Fast Cavalry; Immune to Psychology
    126 points
  • S2 3 Screamers of Tzeentch, Screamers
    Composition: Special Flaming Attacks; Slashing Attack; Hand Weapon; Causes Fear; Daemonic; Flyer; Immune to Psychology
    90 points
  • FH 5 Flesh Hounds of Khorne, Flesh Hounds
    Composition: Special Hand Weapon; Causes Fear; Daemonic; Immune to Psychology; Magic Resistance (3)
    175 points
  • Core
  • PH 10 Pink Horrors of Tzeentch, Pink Horrors
    Composition: Core Flaming Attacks; Hand Weapon; Causes Fear; Daemonic; Immune to Psychology
    120 points
  • D 19 Daemonettes of Slaanesh, Daemonettes
    + Standard, Musician
    Composition: Core Armour Piercing; Hand Weapon; Musician Mus; Standard Bearer Std; Causes Fear; Daemonic; Immune to Psychology
    246 points
  • B2 15 Bloodletters of Khorne, Bloodletters 2
    + Musician, Standard
    Composition: Core Hand Weapon; Musician Mus; Standard Bearer Std; Causes Fear; Daemonic; Immune to Psychology; Killing Blow; Magic Resistance (1)
    198 points
  • B1 15 Bloodletters of Khorne, Bloodletters 1
    + Musician, Standard
    Composition: Core Hand Weapon; Musician Mus; Standard Bearer Std; Causes Fear; Daemonic; Immune to Psychology; Killing Blow; Magic Resistance (1)
    198 points
  • Hero
  • TH Herald of Tzeentch, Tzeentch Herald
    Composition: Hero Flaming Attacks; Hand Weapon; Locus of Tzeentch; Level 2 Wizard; Causes Fear; Daemonic; Immune to Psychology
    165 points
  • SH Herald of Slaanesh (Battle Standard Bearer), Slaanesh Herald
    Composition: Hero Always Strikes First; Armour Piercing; Hand Weapon; Locus of Slaanesh; Level 1 Wizard; Battle Standard Bearer; Causes Fear; Daemonic; Immune to Psychology
    265 points
  • Lord
  • G Keeper of Secrets, General
    Composition: Lord Always Strikes First; Armour Piercing; General; Hand Weapon; Level 4 Wizard; Causes Fear; Causes Terror; Daemonic; Immune to Psychology; Large Target
    575 points
  • Total: 2499 points

Deployment

Warriors

The Warriors army won the right to deploy first and set about deploying as close to the enemy as possible. We had no missile weapons (other than the Hellcannon) or wizards and I wanted to get stuck in before I lost too many troops to magic and whatever else the Daemons had to throw at me. I deployed my Exalted Hero General on a Daemonic Steed in the unit of Chaos Knights (left) and my Army Standard Bearer was another Exalted Hero, deployed with the Marauders.

Daemons

Mike's Daemons took a more cautious stance - hang further back and make me march to him - all the while he could be throwing lightning and turning me into frogs with his amazing 4 spell-casters (his General and both Heralds were wizards, and in addition the Pink Horrors unit gains a magic level for every 8 models. He had 10 so that unit was a level 1 Wizard too). Mike's General was a "Bringer of Change" - Greater Daemon of Tzeentch and a Level 4 Wizard. He had further spell-casters: a Herald of Tzeentch deployed with a unit of Pink Horrors (the unit also counted as a level 1 wizard due to its numerical strength) and a Herald of Slaanesh deployed with the Daemonettes, who was also an Army standard Bearer.

Turn 1 - Warriors of Chaos

The Chaos Warriors did what Chaos Warriors do - "Advance!". With virtually no missile or magic abilities, it was vital for me to get into Hand-to-Hand combat at the earliest possible opportunity, before being ravaged by Mike's spell-casters and Flamers. The one exception was the mighty Hellcannon. It's Chaos Dwarf crew fed screaming, gibbering prisoners into the Hellcannon's vat where they were rendered down and their souls used to feed the eldritch energies of the Daemon imprisoned within the Hellcannon. However, they must have obtained this batch of prisoners from Aldi, for the Hellcannon was displeased. A "Misfire" was rolled when the Hellcannon tried to fire on the unit of Daemonettes, and the Daemon bound within turned on the Chaos Dwarfs and ate them. "Burp!".

Turn 1 - Daemons of Chaos

Mike's Daemons elected for the most part not to move in order to give the spell-casters a chance to soften up their mortal thralls with storms of arcane doohickery. The unit of Screamers was the only one that moved, flying up into the lee-side of the hill.

The expected storm of magicks washed over the Chaos Warriors:
1. The Bringer of change successfully cast "Acquiescence" on the Lancers, rendering them subject to Stupidity for the rest of the game,
  • 2. He then targeted the Lancers again with a "slashing swords of Slaanesh" spell, to no effect,
  • 3. The Herald of Tzeentch attempted an "Acquiescence" on the Marauder Flails, but was out of range,
  • 4. The Herald of Slaanesh cast a "Hunter's spear" at the Lancers, killing two,
  • 5. The Pink Horrors unit cast a "Flickering Flames of Tzeentch" on the Lancers to no effect.

Finally, the unit of Flamers unleashed fiery havoc on the Chaos Warhounds, killing 5. Bolstered by the proximity of the Warrior General, they didn't panic.

Turn 2 - Warriors of Chaos

Disaster for the Lancers - they failed their stupidity roll and only managed to stumble forwards a few paces. Otherwise, the Warriors army continued their advance, wondering what theurgical mayhem Mike's Daemons would unleash next.

Turn 2 - Daemons of Chaos

Mike's Screamers advanced, flying over the heads of the Marauder Flails, the Chaos Warriors and the Chaos Spawn near the tower, dropping a rain of Chaotic filth and causing Mayhem!. 1 Marauder, 3 Chaos Warriors and the Chaos Spawn were killed.

In the Magic phase, The Daemonic Herald of Tzeentch tried another Hunter's Spear on the Lancers, but miscast, wounding himself and killing four Pink Horrors (and thereby reducing their number below that which they count as spell-casters) The Slaanesh Herald's spell-casting attempt is dispelled, the Bringer of Change killed two Marauder Flails with a Slashing Shards of Slaanesh spell, but his Acquiescence at the same unit fails.

Turn 3 - Warriors of Chaos

Turn 3 was where things started to get nasty: Close combat began.

The Warriors of Chaos declared charges. The two Warhounds units declared charges against the Fleshhounds and Flamers, but the fear-causing abilities of the Fleshhounds caused unit CH1 to falter. The Halbardiers charged the Screamers, the Lancers (who passed their Stupidity test) charged the Bloodcrushers and the remaining Spawn charged the Pink Horrors/Herald of Tzeentch. All other units continued their advances, hoping to spill Blood for the Blood God next turn.

The Hellcannon miraculously managed to keep its composure despite still picking bits of its crew out f its teeth and was eligible to fire. It drew itself in and prepared to spout magical death at the Daemonic General, but Misfired again! The Daemonic General took 2 x S10 hits but escaped unharmed due to his Ward Save. The Hellcannon was rendered unable to fire for the rest of the game.

In Close combat, the Warhounds and Flamers killed one each of their opponents and remained locked in combat until the next turn. The Halbardiers killed two Screamers and Daemonic Instability sucked the last one back into the void. The Lancers killed a Bloodcrusher and lost one of their number in return, but won the combat. Instability causes a wound on the remaining Bloodcrusher.

In the combat between the Spawn and the Herald/Horrors unit, the Spawn took 1 wound from the Herald but no other harm was done to either side. The Spawn is unbreakable, so the combat continued next round.

Turn 3 - Daemons of Chaos

Mike decided it was time to commit his forces to the fray.

Bloodletters unit B1 charged the Marauders and Exalted Hero. The Slaanesh Steeds charged the Warriors' General and Chaos Knights. The Harpies flew in from the back lines to attack the Marauders with Flails and the Fleshhounds charged Chaos Hounds unit CH1. The other Bloodletters unit advanced on the Hellcannon, and the Daemonic General made a sneaky outflanking manoeuvre to get around to the side of the Lancers.

The Bringer of change cast a Phantasmagoria spell in order to weaken the resolve of the Warriors of Chaos (this turn, all Ld rolls are done on 3d6 but the lowest scoring die is discarded).

In close combat, no wounds were caused by the Lancers or Bloodcrushers, but Instability finished off the last Bloodcrusher leaving the Lancers free to engage new enemy. The Herald of Tzeentch caused another wound on the Chaos Spawn who in turn killed a Pink Horror. The Harpies flying charge against the Flail-wielding Marauders resulted in three dead Marauders (who had gamely passed their Fear test despite the Phantasmagoria spell) and one dead Harpy, but due to being numerically stronger and carrying a standard the combat holds for another turn. The combat between the Bloodletters and Marauders with the Exalted Hero similarly held, despite two Marauders being killed for only one Bloodletter. The Seekers and Flamers didn't fare so well - both units being decimated by the Chaos Knights and Warhounds. Revenge is had though - the Fleshhounds of Khorne easily dominated their mortal kin - six dead Chaos Warhounds Flee! from an unharmed unit of Fleshhounds who pursued, but didn't manage to keep up.

Turn 4 - Warriors of Chaos

This was a good turn for the Chaos Warriors. The General and his unit of knights charged the already engaged unit of Bloodletters. Between them, the Chaos Marauders and Daemonic Instability, 11 Bloodletters are sent back to the Warp for the loss of only 1 Marauder. The Chaos Spawn killed another Pink Horror, whilst the Hellcannon charged into the other unit of Bloodletters, taking two wounds but killing two Bloodletters in the process.

The ongoing combat between the Furies and the Marauders carried on - 1 Marauder is killed and 1 Fury disintegrates due to instability. The combat held for yet another turn.

The Routing Warhounds continued to rout, but the Halberdiers and the other Warhounds prepared to spend themselves needlessly against the Fleshhounds in a plucky attempt to stop this dangerous unit getting involved in something I'd regret; They begin a pincer movement by closing as best they can on the Fleshhounds. The Lancers, who weren't stupid again this round, attempted to line up on the Daemonic General for a charge next turn, or at least to receive his charge this turn on the front facing.

Turn 4 - Daemons of Chaos

Daemonic movement this turn is downright sneaky - the Daemonettes advanced along the back line towards the engaged Warrior General and Knights. The Fleshhounds pivoted on the spot to engage the approaching Warhounds (not a matched fight) and the Daemonic General again manoeuvred out of line-of-sight of the Lancers.

The General attempted to weaken the Lancers with a Slashing Shards spell, but to no avail. Chaos armour is good stuff! The Herald of Slaanesh in the Daemonette unit cast Acquiescence on the Ogres - Success! They too are now subject to stupidity.

The Herald of Tzeentch finally killed the Chaos Spawn, but the Hellcannon killed two more Bloodletters. The Fury vs. Marauder combat starts to swing in the Warriors favour: 3 Furies died due to wounds or instability for the loss of only one more Marauder. The Warrior General and his Knights killed the remaining Bloodletters, capturing their standard into the bargain!

Turn 5 - Warriors of Chaos

The Ogres failed their stupidity roll (let's be honest - they didn't have far to fall). The routing unit of Warhounds made it off the table counting as a destroyed unit in the Daemons favour.

The remaining Warhounds charged the Fleshhounds and were wiped out. Not quite what I'd planned - I'd hoped to tie the Fleshhounds up for a turn, not give them a hearty breakfast! The Lancers charged the Bloodletters killing 3, and the General and Knights charged the Daemonettes, as did the Marauders and Exalted Hero. The Halberdiers marched around the tower; pursuit of the Fleshhounds is pointless, but it is possible for them to capture a table quarter! The Hellcannon removes four more Bloodletters from the table, with a little help from Daemonic Instability. The Warrior General and Knights and the Hero-led Marauders prepared to engage the Daemonettes, whilst the remaining unit of Chaos Warriors marched back down the table to claim another table quarter.

Turn 5 - Daemons of Chaos

The storm of magic was abating - the Herald of Tzeentch cast "The beast cowers" against the lancers, meaning that their mounts could not attack. Other than that, no spells were cast.

The Fleshhounds charged the Ogres, causing two wounds but losing one hound in the process. The Ogres had to take a break test, but passed due to the proximity of the General and army standard.

The Daemonettes charged the Marauders and the Army Standard bearer who did as he was bound: he offered a challenge to the Herald of Slaanesh leading the Daemons. Due to a deft bit of magic item/gift choosing (icon of despair: -2 Ld, *and* Allure of Slaanesh) - my hero had to pass a Ld test if he wanted to fight: he failed!), Mike denies the Exalted Hero in the Marauders unit a chance to attack. The Marauders break and are destroyed. The Warriors standard *and* army standard captured by the Daemons!

Conclusion:

Time was running short for us and Mike threw in the towel at this point. I doubt the outcome would have been much different if the game had lasted another turn. The Daemonettes would have caused some trouble, but there were also two uncommitted units of Chaos Knights to have some fun with so things at this stage weren't going to change much.
Due to having captured two standards, two table quarters and generally being dead killy, this result was a Solid Victory for the Mortals.
Victory to the Warriors of Chaos!

The Warriors' Tale:

I thoroughly enjoyed this game. Mike and I only manage to get together to play twice a year and it's always good fun. He was fielding the Daemons for the first time and I thought they were a very creative and beautifully-presented army. Some of the paint-jobs were breathtaking - I especially liked the Flamers. They genuinely looked aflame! A very well-based army too - full marks for presentation!

Technically, I think some of the units could have done with having a greater unit strength, but on the whole a lovely army and a great game. Thanks Mike! Can't wait until the next one!


The Warrior
          General stands victorious

The Daemon Speaks:


All credit to Dean, he fielded an excellent army and well painted and modelled too. There's a saying about fielding painted armies because they do better. I think it is true. The Warriors of Chaos fought excellently again and won the day with a Massacre. The Hellcannon model was fantastic and the cohesive painting of the units was echoed by their tactics on the field.
I was worried about Dean's heavy cavalry on the flanks, but didn't really do much to counter it. My magic didn't quite hit the spot and the other units (Flamers, light cavalry etc.) could not do much. I think all the blocks of troops performed well, but they just could not tip the combat resolution in their favour. Next time I would field bigger units. The stars were the Daemonettes and their Herald. Her magic items managed to counter the effect of the enemy Hero. If I had more time to get them into action and more of them I think they could do well. The Fleshhounds also proved useful. The Flamers made a mistake but at the end of the day, they were never going to do much in hand to had. Neither were the screamers.
So next time, I would probably increase the size of core units and drop some of the lighter troops. More Fleshhounds on the flanks would help. The magic was okay, but not enough. Perhaps a Tzeentch army is the way to go. Lots of Magic...
At the end of the day, Warriors of Chaos seem to rule the roost. They have above average Leadership and toughness and attacks, for the points. A solid choice. Putting leaders in units makes magic and shooting that much harder.
Well done to the Warriors - they deserved their win through speed and outflanking. Next time.....

The Daemon General surveys the field:

Mike overlooks
          the table


Photo gallery:

Insert table here
Chaos Warriors Advance
Daemonic Back Lines
Daemonic Back Lines
Daemonic Back Lines
Daemonic Furies, Bloodcrushers and the General
Ogres
Screamers
Stupid Lancers
Warriors General
Screamers Rain Death
Warrior General Advances with Warhounds
Daemonettes, Furies, Marauders and Hellcannon
Halberdiers charge Screamers
Warhounds Charge Flamers
Knights and Marauders vs Bloodletters
Lancers charge Bloodcrushers
Bloodletters vs Warrior General


Component (c) Tom Wright 2009. All rights reserved.
Component (c) 2010 Gerry Elliott. All rights reserved.
Component by Gerry Elliott is licensed under a Creative Commons Attribution-Non-Commercial-Share Alike 3.0 Unported License.
Component (c) Lynx7725 2009. All rights reserved.
Component by Lynx7725 is licensed under a Creative Commons Attribution-Non-Commercial-Share Alike 3.0 Unported License.
Component is Copyright (c) 2009 Tom Wright. All rights reserved.
Component by Tom Wright is licensed under a Creative Commons Attribution-Non-Commercial-Share Alike 3.0 Unported License.
Built with Battle Chronicler

Built with Battle
            Chronicler