Labels

Painting (372) GW (332) Games Workshop (331) Warhammer 40000 (240) Modelling (103) Astra Militarum (65) Imperial Guard (65) Epic (59) Chaos Marines (51) Warhammer 30000 (51) Space Marines (46) Tau (46) Airbrushing (44) Epic Chaos (44) Warhammer (43) Titan (39) Saga (31) Middle Earth SBG (30) Nurgle (29) Gripping Beast (27) IGTanks (25) Anglo-Saxons (24) Blood Bowl (22) Stormcrow Chapter (20) TauTanks (18) Orks (17) Wargames Table (17) Imperial Knights (16) Scenery (16) Black Scorpion (15) Epic Ultramarines (15) Frostgrave (15) Pirates (15) Age of Sigmar (13) 3D Printing (12) Warlord Titan (12) Kings Of War (10) Moria (10) Undead (10) Vampire Counts (10) Angmar (9) Death Guard (9) Forgeworld (9) Mordor (9) Quick Tips (9) Stormcast Eternals (9) AAR (8) Barad Dur (8) Battle Report (8) Goblins (8) Unboxing (8) Wood Elves (8) Isengard (7) Nippon (7) Orcs (7) Siege (7) Wargames Factory (7) Building modular tiles (6) Dreadtober 2016 (6) Sentinels (6) Skaven (6) Vikings (6) Workshop (6) Beastmen (5) Dreadtober 2017 (5) Dropzone Commander (5) Garroting'em Forest (5) Hawk Wargames (5) Humans (5) UCM (5) Warriors of Chaos (5) Imperial Agents (4) Mantic (4) Ogres (4) Sci-Fi Ruins (4) Solar Auxilia (4) Adepta Sororitas (3) Adeptus Ministorum (3) Dwarfs (3) Necromunda (3) Sisters of Battle (3) The Fellowship of The Ring (3) Dead of Dunharrow (2) Kharadron Overlords (2) Nazgul (2) Osgiliath (2) Photography (2) Renedra (2) Trolls (2) Uruk-Hai (2) Amera Plastic Mouldings (1) Armies (1) Bolt Action (1) Cities of Death (1) Days out (1) Germans (1) Giant (1) Marauder (1) Necrons (1) Perry Miniatures (1) Reaper Miniatures (1) Warlord Games (1) em4 Miniatures (1)
Showing posts with label AAR. Show all posts

Thursday, 31 May 2018

BattleReport: Tau vs. Astra Militarum

First weekend in May 2018 gave me and my good friend Mike our first opportunity in four years(!) to get together for a game of Warhammer 40K.

We both live in very different parts of the country and would meet up at a vaguely central location (Warhammer World in Nottingham) a couple of times each year to catch up and do some gaming. Real life has been a sticking point for the last few years so this has been impossible for us.

However, we're back in the game now.

This was our first opportunity to play the 8th Edition rules, with 7th Ed. having entirely passed us by. We made loads of mistakes, learned a bunch of stuff and had a ball. Here's how it went.


The Forces:

1250 Points Astra Militarum (me):
  • 1 x Lord Commander,
  • 1 x Lord Commissar,
  • 4 x Ogryns (inc. Bonehead)
  • 3 x Infantry squads (inc. Grenade Launchers, voxcasters)
  • 3 x Armoured Sentinels with Plasma Cannons
  • 3 x Armoured Sentinels with Multi Lasers
  • 3 x Scout Sentinels with Heavy Flamers
  • 1 x HellHound with Flamer and Inferno Cannon
  • 1 x Chimera with Multi Laser and Heavy Bolter
  • 1 x Valkyrie with Multi Laser, Rocket Pods and Heavy Bolters
  • 1 x Heavy Support squad with 2 x LasCannons and 1 x AutoCannon

1250 Points Tau (Mike):
  • 1 x O'Shova
  • 1 x Aun'va
  • 1 x XV-104 Riptide with  (with 2 x Plasma Rifles and 1 x thingybob)
  • 3 x XV-8 BattleSuits with Plasma Rifles and Missile Pods
  • 3 x Fire Warrior squads
  • 2 x Devilfish
  • 2 x Drone squadrons (3 x Gun Drones, 1 x Markerlight Drone)
The mission played denoted a short-edge - short-edge deployment style. The Astra Militarum had slightly more scenery of their end of the table than the Tau. This meant that Mike was able to deploy slightly closer to his line than I was. He placed one unit of Fire Warriors atop a scenery piece and deployed the other two in Devilfish.
Aun'va in cover behind building "2", Fire Warriors on top of it.

XV-8 Battlesuits on the right flank, XV-104 on the left.

I deployed a Heavy Weapons team in my Valkyrie, an infantry squad in the Chimera and placed everything else as close to my deployment line as possible, intending to spearhead with the Sentinels and Chimera.


The mission dictated that VPs would be earned for each unit destroyed, the death of the enemy commander, first blood and having a presence in the enemy deployment zone at the end of the game.

Astra Militarum got the first turn.


Turn 1:

The Imperials move up. This is an indicator of the way the game was going to go. It had been such a long time since I'd played, a new ruleset and a chance to field two armies (that I'm proud of creating) that I found all logical thought, planning and control just leaked out of my ears and I basically declared a "Waaaaggghhh!" and moved right in there.

My Commissar and Ogryns used the Dagger of Tu'Sakh to deploy behind enemy lines, the Valkyrie nipped round the back of the Tau Lines too. The Valkyrie opened up with everything it had on the Tau infantry on top of "Building 2" wiping them out to a man. The Commissar and Ogryns fired off a few shots, but barely scratched paint. The Plasma-wielding Sentinels moved up and started what was to be a long-game of bullet-tennis with the Riptide (they would spend the entire game standing and shooting at each other). Imperial Infantry moved up using cover of the buildings.

Mike had the Tau play things more cautiously. His battlesuits on his right flank summarily disposed of the threat of the Ogryns, wiping them out to a man and wounding the Commissar. I'd been foolish to have dropped them in when and where I did, but as I said I was totally gung-ho on the day. If my recollection is correct, the Tau declined any further movement on Turn 1. The Riptide returned fire from the Sentinels, but to little avail. 

The table after turn 1


Turn 2:

The Imperials continued in the same vein: Move up, shoot. The Valkyrie backed off a little ready to deploy a payload of troops in Turn 3. Less harm was done this turn overall.

The Tau started to take the fight to the Imperials, however. The BattleSuits wiped out the Commissar whilst the riptide returned fire on the Armoured Sentinels. Drones advanced and poured fire into the advancing Hellhound, but did no damage (they did, however, provide an obstacle for the advancing tank which is by nature a close-assault vehicle. Therefore they effectively stalled it's advance).

A unit of Fire Warriors is deployed from the Devilfish on the Tau right flank, forming a firing line opposing the advancing Sentinels and Chimera.

I like Sentinels

I like Sentinels a lot

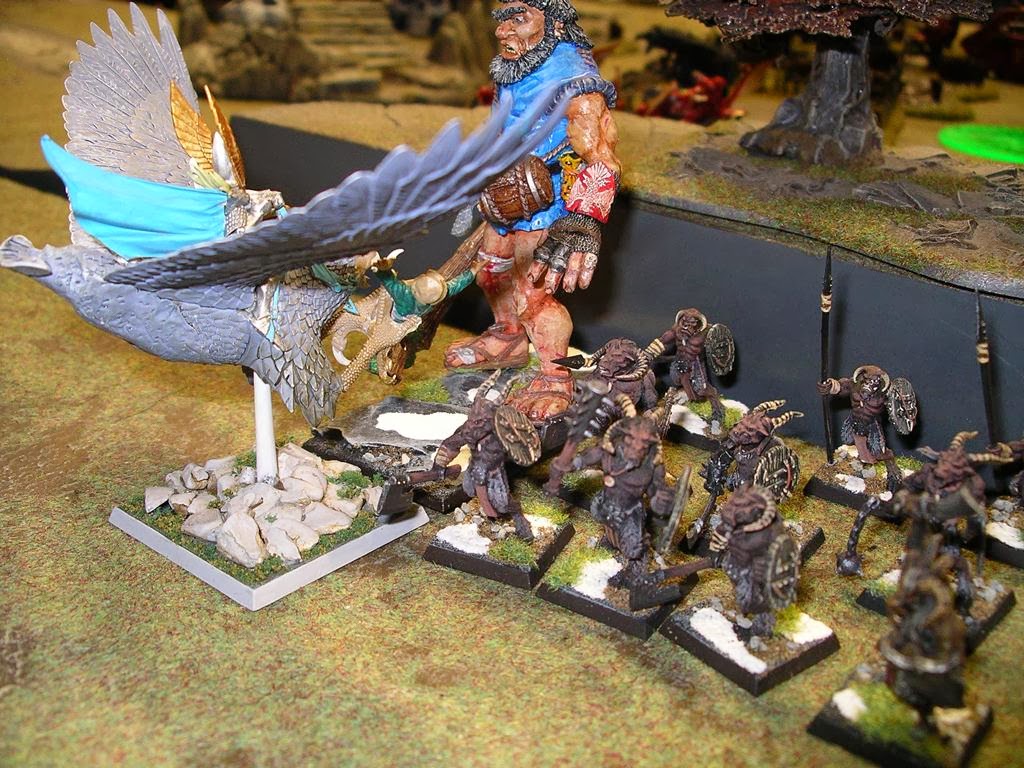
Look carefully - the guardsman in the centre of the photo is a Beastman!

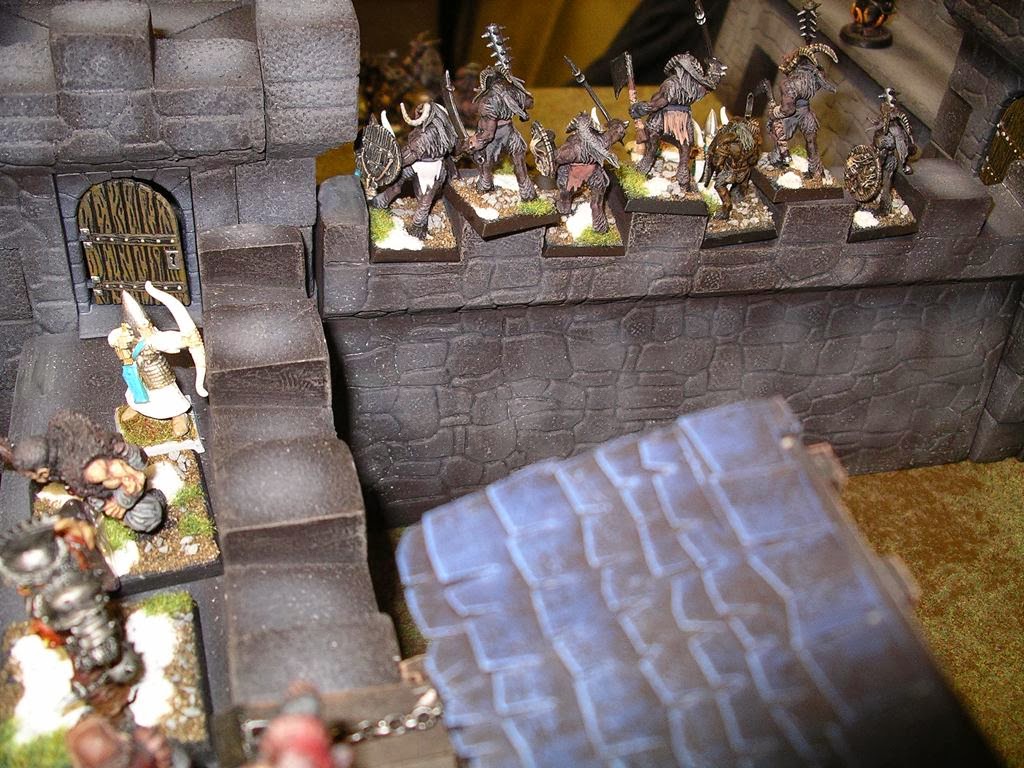
The Guard and the Commander seek an elevated vantage point


Turn 3:

This was my "dumb turn". I deployed a Heavy Weapons team out of the Valkyrie. The Tau General, O'Shova killed it. For some reason instead of staying back and shooting, I charged the Tau infantry on the Tau right flank with my Sentinels. Sentinels are rubbish in close combat. I think I killed just one Warrior but took a couple of wounds in return. I did manage to get rid of the four Drones that were harassing the HellHound.

In return the unit atop the tower in the centre of the table took heavy casualties from fire from Drones and Devilfish.

The Riptide and Sentinels continued trading fire, the Sentinels causing more damage than the Riptide.
    I can see your house from here

    The Tau perspective

    Watch those Sentinels!

    Told you to watch those Sentinels!


    Heavy weapons grav-chute out of the Valkyrie

    The Imperial perspective


    Turn 4:

    Realising my mistake with the Sentinels who I'd put in close combat with the Fire Warriors, I pulled them out of the fight and instead moved them further towards the Tau back line. They joined forces with the Chimera on Mike's right flank and started throwing multi-laser shots at the Battlesuits.

    I'd made another mistake in the previous turn which was that I'd failed to disembark a unit of guardsmen from the aforementioned Chimera on Mike's right flank. They deployed this turn and started shooting at the Fire Warriors that the Sentinels had retreated from. Several were killed in the firefight.

    This was not a turn that was entirely slanted towards Imperial victory, however. The Tau wiped out the Imperial general and the remainder of the infantry squad that were ensconced in the tower. Having wiped out the Imperials behind their lines, O'Shova and Aun'va joined the melee in the middle of the table by physically assaulting the Hellhound.


    The Riptide took some fairly heavy damage from the continued plasma rain from the Sentinels. I think it was this turn that pushed the Riptide into a less performant mode due to damage.


    Turn 5:

    Turn 5 is where the Imperial Imperials, as opposed to the Tau Imperials, cemented their victory. What had been a fairly steady push forward became decisive. The Hellhound and Sentinels nearest O'Shova and Aun'va managed to score significant wounds on the Tau leaders. The Chimera and Sentinels continued firing on the Battlesuits and again did real damage. The guardsmen engaged with the Fire Warriors also did significant harm to their foes. On the other side of the table, the Sentinels with the plasma weapons again knocked bits off the riptide. Other Imperial models tried without much success to damage Devilfish.

    The Tau didn't go down easy: The Riptide broke away from its firefight with the Setinels, having had very little effect on them throughout the battle. It turned its attention to the Valkyrie which had been harassing the Tau back-line all the way through the game. Damage *was* done, but too little, too late. The Fire warriors returned fire on the guardsmen taking a few down, whilst the Battlesuits fought back against the advancing Sentinel/Chimera, again causing some damage.
      I must stop taking photos of Sentinels...


      The center of the action 
      The dice was rolled according to the mission brief - we were going to a 6th turn.


      Turn 6:

       And it's all over  for the Tau. In the Imperial turn, the Valkyrie put some distance between itself and the advancing Riptide and joined the fray in the action hot-spot. Joining forces with the two unit of Sentinels on that side of the table and alongside the Hellhound, they together manage to take out Aun'va and O'Shova. The remaining guardsmen finish off the Fire Warriors.

      Mike (the Tau Emperor), without taking his turn, declared defeat. If my recollection is correct, all that remained of the Tau force at this point was the two Devilfish and the debilitated Riptide.

      The 'tide has turned. Literally - it's facing the other way!


      Conclusion:

      What a hoot! But we made so many mistakes!

      First, I think it's fair to say that we found Warhammer World a slightly frustrating place to game in. We've been there many times before, but this was our first visit in several years and the whole place had been refitted in order to massively expand the GW store and also to fit a ForgeWorld store in.

      That has reduced the gaming area to something like 1/3 the size it used to be. We'd booked a table well in advance, so that wasn't an issue, but it was a little more cramped than before, a heck of a lot louder and there was one other major frustration: The gaming hall's air-conditioning is mental! It was blowing our paperwork all over the place.

      The game itself was our first go with 40K 8th Edition. So much time had passed since we last managed to get together that we'd completely skipped 7th edition. We made a horrible amount of errors, including:

      • I totally forgot to get my Astra Militarum general to issue any orders,
      • I forgot that my squad leaders had boltguns,
      • We got the overwatch rules wrong for flamer-equipped troops (we rolled for 6's instead of auto-hitting),
      • We forgot all about Kau'yon and Mont'ka rules for the Tau,
      • I didn't appreciate how much more solid vehicles and walkers are under the new rules and as a result I didn't give the best weapons load-out to the armies when building the lists. That made it almost impossible for either of us to do any significant amount of damage to each others' vehicles.
      Did we enjoy ourselves? Yes,
      Was it great to see Mike again after all these years? Yes
      Are we going to do it again? Damn right - later this year. Age of Sigmar (which again, neither of us has played before. My Stormcast versus a Nurgle force Mike is working on).

      Can't wait!

      My good friend and Tau General, Mike.

      Thanks, Mike - great game!

      Friday, 13 December 2013

      BattleReport: High Elves vs. Beasts of Chaos Siege!

      High Elves vs. Beasts of Chaos

      Yllyriel paced the castle walls, his delicate mail armour cold against his skin in the chill of dawn. The Sun was just beginning to crest the mountain range behind the castle throwing long, but progressively shortening shadows into the castle and across the plain beyond as it rose higher into the sky.

      A light mist lay on the plain and as the sunlight hit it, Yllyriel could see it boil away. As the shadows receeded and the mist lifted, the forest beyond the plain came clearer into view.

      It was a beautiful morning.

      Dawn was always his favourite time to be on sentry duty. Landrien, the other sentry on this section of wall approached him. "We are blessed with another beautiful day, Yllyriel!" he said. 

      "Agreed, my friend. Agreed."

      They stood together for a time, drinking in the view. They were about to part to continue their patrols when the sound from a brash, loud horn assaulted their ears. No Elven horn, that! It had a cracked, discordant tone which was chilling to the ear.

      "Where did that come from?" asked Landrien. He'd barely finished speaking when another horn sounded, this one clearly from their left. A third horn blarted out, pitched lower than the first and louder - closer? - than the second.

      Yllyriel saw them then - spilling from the forest. Beastmen! Equipped for an assault. Battering Rams, Siege Towers. The filthy creatures were attacking.

      Yllyriel cried, "Alarm! Alarm! We are attacked!"

      Landrien pulled his own horn from his belt. As he raised it to his lips, another horn - definately Elven - sounded. Sentries from other parts of the castle had seen it too. He joined his horn's call with theirs and others joined them in quick succession. Not the dirty, broken, blatting of the Beasts horns, these, but clear tones; pure and strong.

      The High Elf garrison readied itself for battle as the Beasts of Chaos advanced on the walls. They were besieged!

      Game Notes

      This was a Siege game played using Warhammer 7th Edition core rules and the Siege Scenario from the Warhammer 6th Edition rulebook (Games Workshop haven't been kind enough to maintain their Siege Rules from one release to the next, so compromises have to be made). 

      There are differences in some of the core rules between the two editions, notably for this game in the "Attacking across a defended obstacle" rule. We decided that we would play with the "stiffer" of the two rules - that from the 6th Ed. book which required a roll of a natural "6" to hit. We also decided that - to make life not impossible for the attackers - to allow them to use hand-weapon and shield as normal (even though in real life climbing a grappling hook rope would make that impossible).

      This was our first attempt at playing a Siege using these rules and as such the game should be considered "experimental". It was also Mike's first outing as a High Elf General so his army list was completely untried in the field, whereas I'd played the Beasts once before and knew them to be a formidable close combat force.

      Overview

      Location: Warhammer World, Nottingham
      Date played: 16 November 2013

      High Elves

      General: Mike

      Hero

      • W Mage, Wizard
        Composition: Hero Level 2 Upgrade; Hand Weapon
        175 points
      • Gen Noble, General on Giant Eagle
        + Great Eagle
        Composition: Hero General; Hand Weapon; Dragon Armour; Shield
        178 points

      Core

      • A1 10 Archers, Archers 1
        Composition: Core Hand Weapon; Boiling Oil;  Longbow
        135 points
      • A2 10 Archers, Archers 2
        Composition: Core Hand Weapon; Longbow
        110 points
      • A3 10 Archers, Archers 3
        Composition: Core Hand Weapon; Longbow
        110 points
      • A4 10 Archers, Archers 4
        Composition: Core Hand Weapon; Boiling Oil; Longbow
        135 points
      • S1 15 Spearmen, Spears 1
        + Musician, Standard
        Composition: Core Musician Mus; Standard Bearer Std; Hand Weapon; Spear; Light Armour; Shield
        150 points

      Special

      • DPoC 7 Dragon Princes of Caledor, Dragon Princes of Caledor
        + Musician, Standard
        Composition: Special Musician Mus; Standard Bearer Std; Barding; Hand Weapon; Lance; Dragon Armour; Shield
        240 points
      • SW1 8 Shadow Warriors, Shadow Warriors 1
        Composition: Special Hand Weapon; Longbow; Light Armour; Scouts; Skirmishers
        128 points
      • SW2 8 Shadow Warriors, Shadow Warriors 2
        Composition: Special Hand Weapon; Longbow; Light Armour; Rocks; Scouts; Skirmishers
        138 points
      • Total: 1500 points


      Beasts of Chaos

      General: Dean

      Lord

      • Gen Beastlord of Tzeentch, General
        Composition: Lord General; Mark of Tzeentch; Hand Weapon; Heavy Armour
        301 points
      • Wiz Great Bray-Shaman, Wizard
        Composition: Lord Mark of Chaos Undivided; Level 4 Upgrade; Hand Weapon; Braystaff
        233 points

      Hero

      • W1 Wargor, Wargor 1
        Composition: Hero Mark of Chaos Undivided; Hand Weapon; Great Weapon; Heavy Armour
        68 points
      • W2 Wargor, Wargor 2
        Composition: Hero Mark of Chaos Undivided; Hand Weapon; Great Weapon; Heavy Armour
        68 points
      • W3 Wargor, Wargor 3
        Composition: Hero Mark of Chaos Undivided; Hand Weapon; Great Weapon; Heavy Armour
        68 points
      • W4 Wargor, Wargor 4
        Composition: Hero Mark of Chaos Undivided; Hand Weapon; Great Weapon; Heavy Armour
        68 points

      Core

      • BH1 11 Gors, 5 Ungors Beast Herd 1
        Composition: Core Hand Weapon; Shield. Ungors have spears.
        100 points
      • BH2 10 Gors, 5 Ungors Beast Herd 2
        Composition: Core Hand Weapon; Shield. Ungors have spears.
        95 points
      • BH3 10 Gors, 5 Ungors Beast Herd 3
        Composition: Core Hand Weapon; Shield. Ungors have spears.
        95 points
      • BH4 10  Gors, 5 Ungors Beast Herd 4
        Composition: Core Hand Weapon; Shield. Ungors have spears.
        95 points
      • T1 15 Bestigor Herd of Tzeentch, Tzaangors 1
        + Gouge-Horn
        Composition: Core Mark of Tzeentch; Hand Weapon; Great Weapon; Heavy Armour
        212 points
      • T2 15 Bestigor Herd of Tzeentch, Tzaangors 2
        + Gouge-Horn
        Composition: Core Mark of Tzeentch; Hand Weapon; Great Weapon; Heavy Armour
        212 points

      Special

      • 6 Minotaurs of Tzeentch, Minotaurs
        Composition: Special Mark of Tzeentch; Hand Weapon; Extra Hand Weapon; Light Armour
        302 points
      • 6 Chaos Ogres, Ogres
        Composition: Special Hand Weapon; Extra Hand Weapon; Heavy Armour
        252 points
      • 10 Centigor, Centigors
        Composition: Special Hand Weapon; Spear; Light Armour; Shield
        190 points

      Rare

      • CS Firewyrm of Tzeentch, Chaos Spawn
        Composition: Rare Firewyrm Breath; Causes Fear; Unbreakable
        75 points
      • Chaos Giant, Giant
        Composition: Rare Giant Special Attacks; Causes Terror; Large Target; Stubborn
        205 points

      Siege Equipment

      • R1 Battering Ram
        50 points
      • R2 Battering Ram
        50 points
      • T1 Siege Tower
        25 points
      • T2 Siege Tower
        25 points

      • Total: 3000 points


      Deployment

      Deployment Map
      The game was played on a 6' x 4' table. We'd mulled over a number of layouts for the castle and the one we favoured was, in all truth, slightly too large for the table. According to the deployment rules, the attackers can't be set up within 24'' of the castle. We couldn't achieve that on this table so instead the Beasts (which typically have a 5'' move and therefore a 5'' march move) set up within 14'' of the castle (where they would have got to after one turn of movement). Turn one was played without movement - just shooting and magic at an assumed range of 24''. That dealt quite nicely with the smaller-than-ideal table.

      The castle was built on the "North" table edge allowing the Beasts to deply on the South edge and also the East and West flanks.

      High Elf Deployment Notes:
      • The High Elf General was mounted on a Giant Eagle.
      • High Elf Units "Archers 3" and "Archers 3" were equipped with cauldrons of Boiling Oil.
      • High Elf Unit "Shadow Warriors 2" was equipped with Throwing Rocks. The wall section they were positioned on was the Castle Gate, and the wall section north and parallel to it contained another Gate.


      Beasts Deployment Notes:
      • Beasts unit "Ogres" were equipped with a Siege Tower, inside which the Army General was deployed.
      • Beasts unit "Minotaurs" were equipped with a Siege Tower, inside which the Wizard (Great Bray Shaman) was deployed.
      • Beasts units "Tzaangors 1" and "Tzaangors 2" were equipped with Battering Rams.


      Spells:
      • The High Elf L2 Wizard rolled "Fury of Khaine" and "Shield of Sephery". In addition, he gets "Drain Magic" for free.
      • The Beasts General (Level 4 Tzeentch Wizard), rolled "Yellow Fire of Transmutation", "Green Fire of Mutation", "Blue Fire of Metamorphosis" and "Indigo Fire of Change".
      • The Beasts Great Bray Shaman (Level 4) rolled "The Bear's Anger", "The Crow's Feast", "The Beast Cowers" and "The Hunters Spear".

      Turn 1 - High Elves

      Elf Turn 1
      No movement took place in Turn 1 - the Elves stayed put as deployed and as it was assumed that turn would be used getting to the point on the table where the Beasts deployed (see Deployment Notes - this was to overcome the problem of the small table) they didn't move either.
      • The Elf Wizard cast "Drain Magic", but it was dispelled by the Beasts.
      • Elf unit "Archers 1" shot at "Beast Herd 1" causing three hits, but no wounds.
      • Elf unit "Archers 2" shot at "Beast Herd 2" killing two Ungors.
      • Elf unit "Shadow Warriors 2" shot at "Tzaangors 1" but failed to do any damage.
      • Elf unit "Shadow Warriors 2" shot at "Beast Herd 3" killing one Ungor.
      • Elf unit "Archers 3" shot at "Beast Herd 4" killing one Ungor.

      First blood to the Elves!

      Turn 1 - Beasts of Chaos

      Beasts Turn 1
      The Beast General irrevocably cast "Yellow Fire..." on himself giving himself and the accompanying Ogres a Ward save. All other spells were out of range and the Beasts have no ranged weapons, so that was it for them!

      Turn 2 - High Elves

      Elf Turn 2
      • The High Elf General takes to the skies on his mighty Giant Eagle and charges the Chaos Giant. His bravado is short-lived, however, as he fails his "Terror!" roll and flees back to his eyrie on the Castle tower.
      • "Beast Herd 2" takes a pounding from High Elf Magic and archery, losing three Ungors and one Gor to the Elf Mage's "Fury of Khaine" spell and then two more Gors thanks to "Archers 2"'s pinpoint shooting. "Archers 6" were less fortunate, failing to cause any wounds.
      • "Archers 1" killed two Ungors in "Beast Herd 1" and not to be outdone, "Shadow Warriors 2" killed 3 Ungors from "Beast Herd 3".
      • The punishment doesn't stop there - "Archers 3" pound "Beast Herd 4" with arrows killing two Ungors and one Gor.
      • There the fortunes of the High Elf Archers fail: "Shadow Warriors 2" fail to score any wounds on "Tzaangors 1" and "Archers 4" fail to inflict further punishment on the beleaguered "Beast Herd 2".

      Turn 2 - Beasts of Chaos

      Beasts Turn 2
      • The Beasts advance! All units move up to their fullest extent.
      • Having no missiles, the only possibility for the Beasts to do any harm is with Magic. Magic is, however, something the Beasts bring in vast quantity. The General casts "Green Fire..." on "Archers 2", killing three Elves. He then casts "Indigo Fire..." on the same unit. Wracked with Magical forces, two of the Elves in the unit are transformed into Tzaangors!
      • The Beast's Great Bray Shaman casts "Hunter's Spear" at "Spears 1" but it is dispelled by the High Elf Mage. He gathers his magic again and hurls "The Crows Feast" at the Spearmen, killing one.

      Turn 3 - High Elves

      Elf Turn 3

      • The High Elf General gathers himself and rallies - he spends the remainder of the turn reforming.
      • Panic spreads, though - "Archer 3" finding a Terror!-causing Chaos Giant bearing down on them Flee! in to the courtard
      • The High Elf Wizard has an unfortunate rounds - he attempts to bolster "Archers 2" with "Shield of Sephery" but fails. He then tries to debilitate the Beasts magical abilities with his innate "Drain Magic" spell, but his attempt is Dispelled.
      • The High Elf archers fare no better in what turns out to be a disastrous turn - all their shooting fails apart from "Archers 4" who manage to kill one more Ungor from Beast Herd 2. The Beast Herds' skirmish formation and high Toughness are ruining what is normally devastating missile fire from the Elves.
      • In close combat "Archers 2", who were effectively charged by new unit "Bestigors 3" defend themselves admirably - the combat is drawn with no casualties on either side.

      Turn 3 - Beasts of Chaos

      Beasts Turn 3
      • The Beast General dismounts the Siege Tower now that he's in easy spell-casting range of the castle and casts "Green Fire..." at the High Elf Mage, causing 1 Wound. Determined to press home the advantage, he also casts "Indigo Fire..." but the plucky Elven Mage Dispels the torrent of filthy Chaos Magic, even whilst still reeling from the damage caused by the first spell.
      • The Great Bray Shaman also dismounts his Siege Tower but has a less successful round: he casts "The Crows Feast" at the Elven General but causes no damage then goes on to cast "The Hunter's Spear" at the Elven General, which is Dispelled. Muttering crossly to himself, he casts "The Bear's Anger" on "Beast Herd 3" to give them an advantage in close combat.
      • "Beast Herd 1" Assault the ramparts. "Archers 1" defend, killing three Ungors with their Boiling Oil and a further Gor in
      • close combat. The Beasts retaliate by killing two Archers.
      • "Beast Herd 2" moves closer to the castle in order to be able to assault next turn.
      • "Beast Herd 3" Assaults "Spears 1" alongside the Minotaurs who spew roaring from their Siege Tower. In a shockingly poor round of combat, the magically augmented Herd and the Minotaurs fail to cause any wounds at all on the High Elf Spearmen. One Minotaur is wounded in return. The combat is a stand-off!
      • "Beast Herd 4" climb the undefended walls that "Archers 3" fled from.
      • "Tzaangors 1" assault the gates with their Battering Ram. They damage the gate, weakening it, but loas 3 of their number due to thrown rocks in the process.
      • On the ramparts, the magically created unit of Bestigors "Bestigors 3" kills one Archer from unit "Archers 2", but as the Archers outnumber the Bestigors the combat is drawn.
      • Other Beast units advance in order to press home the attack
        .

      Turn 4 - High Elves

      Elf Turn 4
      • High Elf unit "Archers 4" fail to rally and flee from the table.
      • The Elven Wizard casts "Fury of Khaine" on the Beast General, but he Dispels the spell easily.
      • The Elf General decides to deal with his own fears and to tackle the "Big Scary" on the table - he assaults the Giant. Again. This time, the Terror! test is passed. The General fails to Wound the Giant, but his Eagle causes one Wound. Peeved, the Giant does a "Thump with club" attack on the Eagle and kills it. The General dismounts and readies to deal with the Giant on foot in a proper "David and Goliath" scrap.
      • The "Dragon Princes", spying the Beasts climbing over the walls turn, ready to face their foe.
      • "Shadow Warriors 1" turn to face "Beast Herd 4" and loose a volley of arrow, killing a Gor and an Ungor.
      • "Shadow Warriors 2" continue to rain rocks on the Tzaangors attacking the gate, killing three more of them. The Tzaangors do not Panic!
      • Things get very bloody on the far right wall. The assault goes the way of the Beasts - four Elves are killed in unit "Archers 1" who Flee! and are Pursued into the courtyard, caught and killed.
      • "Archers 2" have mettle! They lay about the "Bestigor 3" unit and slay the two Bestigors who used to be members of their own unit!
      • These Elven Archers are made of stern stuff: "Archers 4" trade blows with the assaulting Ogres losing two of their own number but holding the walls as they badly wound one of the Ogres.
      • Outside the castle, "Tzaangors 1" swing their Ram gain at the gate, shattering it! They discard the Ram and make ready to enter the courtyard., leaving their kin in "Tzaangors 2" to bring up the next Ram to tackle the inner-courtyard's gate.
      • The courtyard is becoming a busy place. "Spears 1" have a poor round, doing no Wounds against the attacking forces. The Wargor with "Beast Herd 3" kills three Elves. His Herd kill another one, and a Minotaur kills a fifth. The Elves break, Flee! but are pursued by "Beast Herd 3" and caught and killed.

      Turn 4 - Beasts of Chaos

      Beasts Turn 4
      • The Beast General advances toward the Elf Mage and casts "Blue Fire..." - the Elf Wizard dies, wracked with pain.
      • Beasts magic falters, however as the Beast Wizard hurls spells at "Shadow Warriors 1" which all either fail or are Dispelled.
      • "Beast Herd 1" advances towards the "Dragon Princes" readying themselves to charge.
      • "Beast Herd 2" assaults the walls, allowing no respite for "Archers 2". 1 Gor is killed in the assault and the Wargor kills two Archers, but the Elves are strong of spirit and hold fast!
      • "Beast Herd 3" along with their Wargor leader climb the gated wall and ready to assault into the large courtyard.
      • "Beast Herd 4" move into the courtyard, readying themselves for a fight with the "Dragon Princes" which "Beast Herds 1 & 3" are both also planning to join.
      • The minotaurs move off the walls and into the courtyard. Unless the inner gate comes down, they will be trapped here as they can't scale walls (no ladders or grapples) and they can't move through the towers due to their size.
      • Two more Elves fall to the Ogres, but they show their bravery and continue to hold.
      • "Tzaangors 1" move through the gate and into the small courtyard with their kin in "Tzaangors 2" close on their heels with their Battering Ram.
      • The Chaos Spawn lurches towards the gate (having largely been forgotten about in the last turn or two and left to drool on the walls!)
      • The Chaos Giant trades blows with the High Elf General and kills him.
      • The Centigors hold position as the gate is too crowded.

      Turn 5 - High Elves

      Elf Turn 5
      • "Dragon Princes..." charge "Beast Herd 4" - 6 Gors are killed in the charge, one Elf dies. The Beasts Break, Flee! and are cut down.
      • "Shadow Warriors 2" turn to follow "Tzaangors 1" as they progress into the courtyard and drop more rocks on them as they pass through the gate. Their aim is off, however and they cause no wounds.
      • On the walls, the combats continue as the Elves keep up their valiant defence. "Archers 2" hold their wall with no losses on either side, whilst in the battle against the Ogres, "Archers 4" lose a man but continue to hold their position.
      • Despite having a Terror! causing Chaos Giant bearing down on them, "Shadow Warriors 1" turn to engage the Giant and cause 2 Wounds on him! The Giant tries a bit of lateral thinking - take out the wall. Unfortunately, using his head is not his strong point as he discovers after head-butting the wall, causing it no damage.

      Turn 5 - Beasts of Chaos

      Beasts Turn 5
      • The Beast General and Wizard re-enter their Siege Towers as a way of gaining access to the castle.
      • "Beast Herd 1" March on the "Dragon Princes..."
      • "Tzaangors 1" finally lose their patience with "Shadow Warriors 2" and engage them on the walls. One Elf is killed, and the Elves hold fast.
      • "Tzaangors 2" advance on the inner gate with their Battering Ram.
      • "Beast Herd 3" descends the wall, ready to take on the "Dragon Princes..."
      • The Spawn advances into the courtyard, followed by the Centigors.
      • "Beast Herd 2" kill another Elf, but the Elves continue to hold their wall. Indomitable or what!
      • In a precise repeat of the previous turn, "Shadow Warriors 1" cause a further 2 Wounds on the Giant who again (probably concussed from the previous attempt) head-butts the wall, causing it no damage.
      • The Ogres finally put paid to the remaining members of "Archers 4" and consolidate onto the walls.

      Conclusions |

      The game was cut short at that point. A Siege, according to the 6th Edition Siege Scenario, should last a fixed turn count of seven turns. We were forced to end the game at the end of turn 5 as time was running short and I'd got a situation that I needed to assist with at home. That said, it was becoming a bit of a grinder anyway - the walls had been carried and it was only a matter of time before the High Elves were completely destroyed. The High Elf Cavalry unit in the main castle square was pretty much the only unit left and - whilst it was a powerful unit which had already destroyed a Beast Herd - it was quite simply outnumbered to a vast degree. The Bestigors should have battered the gate down leaving the inner courtyard open to them, the Ogres and the Minotaurs. It was, I think, only a matter of time.

      Victory to the Beasts of Chaos!

      From the High Elves perspective

      So, another victory for Dean! Well, I have to say, for the scenery alone, Dean deserved a win. The Castle, siege equipment and his army were all top notch and a joy to photograph. 

      So what happened? The Elven archery was not decisive enough. I kept shooting the soft targets of the skirmishers which were hard to hit. The Towers and Giant really needed some punch - probably a bolt thrower or two. 
      Mike, the High Elf General

      The Giant was awesome as it couldn't hit much at all apart from the Elf General and his Eagle. what he did do was cause Terror. If I could rewind the game, bringing down the Giant with bowfire would have been the key to helping save the right flank of the table.

      I should have worried less about the Beastmen getting into the back of the Castle as the Elf Cavalry clearly had the advantage in the back field. 

      The next problem was how to stop the Siege Towers and Rams. I couldn't take down enough of the Beastmen with the Ram before they reached the gates. More firepower would have been good here. The rocks were OK, better than Elf archery really! 

      Once the Siege Towers made it, the Elves were never going to stand up to that onslaught. T3 troops are fragile. The only thing going for the Elves was their Always Strikes First. 

      It was always going to be a war of attrition, I just needed to slow down the Beasts until turn 7, hopefully denying them a win.

      A couple more turns and the game would have ended perhaps without a clear winner. As it was, the Elves held only one section out of four and lost the game.

      I think the Elf list was too frivolous and fragile. The Eagle and Hero did nothing. At 1500 points I couldn't take an Elf Mage Lord to balance up the magic. Having been beaten on magic, I even saw some of my elves turned into Beastmen on my own ramparts. Yuk. 

      Another go at this and I think decisive archery, solid defensive units in two of the sections of the castle, a bolt thrower and some better magic along with a way of handling Terror and Psychology in general would be good. As it was, my puny High Elves crumpled too quickly....

      Next time... ! ?

      From the Beasts Perspective

      I very much enjoyed the game - I always enjoy wargaming and it was great to catch up with Mike - we don't get together nearly often enough. That said, I'm not really sure, in retrospect, about the Siege Rules. Looking back on it the game felt imbalanced in my favour. According to the Scenario the defending player gets 1500pts and the attacker gets 3000pts. That allowed me to lay in a large force with some heavy units (Ogres, Minotaurs), plenty of Siege kit (Towers, Rams, grapples), a Giant and - most importantly on the day - loads of characters. Each Beast Herd had a "Hero" to lead it and there were two "Lord" characters. Sounds heavy enough until you realise that one Lord had the Mark of Tzeentch (making him a level 4 wizard) and the other *was* a Level 4 wizard. To add insult to injury I had enough points to equip a number of my units with the Mark of Tzeentch, each of which gave me an additional Power Dice.
      Dean, The Beats of Chaos General

      What all that meant was that I could lay out a devastating amount of Magic every turn, knocking holes in Mike's units and turning his units on themselves with some horrible spells.

      Mike just didn't have the points to spend to defend against that sort of thing.

      In addition to that little lot, I don't think it was hard enough to scale the walls. It should be nigh-on impossible for me to scale and take the battlements. Our "house rule" which allowed me to use my hand-weapon and shield (and therefore still get a 5+ save) no doubt contributed to that.

      So all in all - I won, but I'm not sure I deserved to win (at least not as easily as it felt like I did).

      Photos from the game


      The Report is Copyright (c) 2009 Dean Kelly. All rights reserved.
      The Report by Dean Kelly is licensed under a Creative Commons Attribution-Non-Commercial-No Derivative Works 3.0 Unported License.
      Component (c) Lynx7725 2009. All rights reserved.
      Component by Lynx7725 is licensed under a Creative Commons Attribution-Non-Commercial-Share Alike 3.0 Unported License.
      Component is Copyright (c) 2009 Tom Wright. All rights reserved.
      Component by Tom Wright is licensed under a Creative Commons Attribution-Non-Commercial-Share Alike 3.0 Unported License.
      Built with Battle Chronicler
      Built with Battle Chronicler