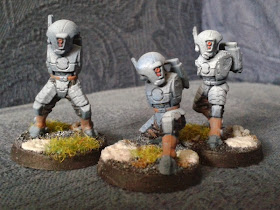
I went back over the three models I painted in Part 2 and looked at details I wasn't happy with:
- gaiters,
- straps,
- lenses,
- cloth,
- backpack
I deepened the brown on the gaiters and straps by overpainting it with a darker brown and then going back to my original brown as a highlight.
I improved the lenses - I'd originally painted them red, orange highlight to the bottom-right, white dot to the upper-left. I didn't think this looked "deep" enough either, so I took the same dark brown I'd used for the gaiters/straps and overpainted the whole lens, then applied the red/orange/white on top of it.
The backpack also picked up some dark/mid brown detail.
Lastly the cloth got a haphazard white highlight.
Before:
After:
I think it's an improvement.
I still want to give these guys an oil wash to pick out seams in armour plates and deepen the recess on the backpack where the two red lights are. Obviously you can't see what I'm up to on the models' arms either. Sept markings need to be added too. Aside from that, I'm happy with these guys now and this is the scheme I'll be rolling out for the whole army.
I like to work with very limited palettes so I've only used a very small variety of paints so far:
Undercoat:
- Halfords grey "plastic" primer
Airbrushing (dark to light, all "minitaire" paints):
- Nautilus blue,
- Werewolf grey,
- Snow white
Brush painting (all "Anita's" brand hobby paints - excellent budget paints if you can get them):
- Black,
- White,
- Red,
- Carrot Orange,
- Red Earth (the light brown colour),
- Burnt Umber (the dark brown colour).
Other Tau-related stuff:


No comments:
Post a Comment
I'm interested to hear what you think. Please leave any comments you'd like to make here.